

Article: F1 Apparel Care Guide
F1 Apparel Care Guide

An 8-Step Guide For How To Wash F1 Apparel
We’ve all been there—you pull your favorite F1 shirt out of the washer and notice it’s not quite the same. The colors look a bit dull. The print doesn’t feel as smooth. Maybe you’re starting to see tiny cracks in the design.
If you’ve ever searched “how to wash f1 merch” or “how to properly wash F1 apparel,” then this guide was written for you.
My name’s Jack, and I’m part of the handmade apparel team at Utmost Province®. For the last few years, I’ve been surrounded by F1-inspired apparel and merchandise—designing them, printing them, packing them, and learning what happens when you don’t wash your F1 apparel the right way.
The is why I've put together a simple 8-step checklist that’ll show you how to wash your F1 shirts and F1 hoodies, so you can avoid the mistakes I’ve made. If reading isn’t for you, there’s also a short clip that’ll walk you through the process.

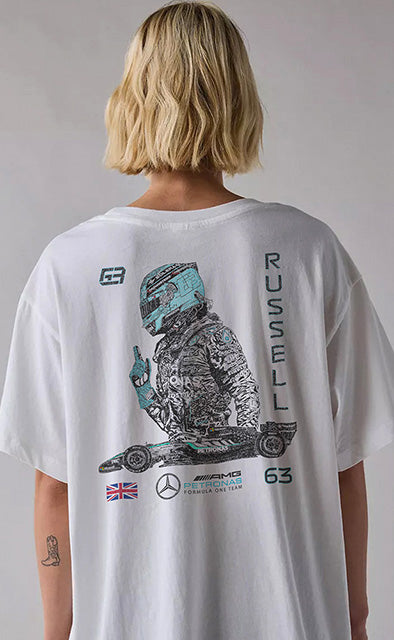
Why Handmade F1 Apparel Needs Proper Care
F1-inspired shirts and hoodies aren’t just another basic custom apparel piece. You’re usually dealing with things like:
- Direct-to-garment (DTG) prints
- Screen prints or heat transfers
- Different types of fabrics, depending on where you bought the shirt
- The different types of materials the makers used
All the different ways your custom F1 merchandise and apparel can be made. Depending on the production method used to make your custom F1 apparel, each method requires specific care instruction, to avoid ruining your favorite F1 t-shirt. Another reasons why you need to know how to properly care for them. Otherwise you can run into issues like faded prints, cracked lines, bleeding colors on the design. All of which depends on how you wash and dry your F1 clothing, which can make a big difference in how long they last. So from that being said, shall we begin?
- 1. An 8-Step Guide For How To Wash F1 Apparel
- 2. Why Handmade F1 Apparel Needs Proper Care
- 3. The Best Way To Wash Custom Shirts Short Video
- 4. Checklist For How To Wash F1 Apparel
-
5. The 8-Step Detailed Guide For How To Wash F1 Apparel
- 5.1 Step #1: Turn Garment Inside Out
- 5.2 Step #2 Use Delicate Wash Cycle
- 5.3 Step #3: Only Use Cold Water Your 1st Three Wash Cycles
- 5.4 Step #4: Choose Mild Detergent
- 5.5 Step #5: Avoid Overloading Wash Machine
- 5.6 Step #6: Air Dry Or Tumble Dry Low
- 5.7 Step #7: Removing Wrinkles
- 5.8 Step #8: Handling Stains
- 6. F1 Apparel Washing & Care FAQs
The Best Way To Wash Custom Shirts Short Video
Checklist For How To Wash F1 Apparel
| Steps | Instructions | What It Does | Benefits |
| 1. Turn Garment Inside Out | Turn your custom clothing inside out before washing. | Minimizes direct contact with the washing machine and other clothes | Reduces wear on designs and protects it from friction & fading. |
| 2. Use Delicate Wash Cycle | Set washing machine to delicate cycle. | More gentle and less harsh on custom shirt designs. | Preserves the unique designs of your custom shirts and F1 merch. |
| 3. Cold Wash | Set your washing machine on cold water temperature settings. | Preserves the quality of your custom shirts and the designs. | Prevents shrinking and fading of shirt designs. |
| 4. Use Mild Detergent | Choose a mild, color-safe detergent that’s free from bleach or harsh chemicals Avoid fabric softeners, which can leave residue and dull your apparel’s design. |
More gentle on your clothing and the designs. | Increase the longevity of your shirt's fabric and design. |
| 5. Avoid Overloading Wash Machine | Wash your laundry in smaller batches. Overloading can lead to excessive friction, causing wear and tear. |
Prevents color bleeding, fades, and cracks. | Longer lasting t-shirt, and less damage. |
| 6. Air Dry or Tumble Dry Low | Hang-dry is your custom t-shirts and avoid direct sunlight, which can fade colors. Using Dryer: Set dryer to low temperature heat setting. |
Prevents colors and designs from fading. | Brighter colors and preserves the quality of your design. |
| 7. Ironing or Steaming | Turn the garment inside out. Use a low-heat setting or place a cloth between the iron and the design. Using a Steamer: Steamers are a great alternative for removing wrinkles without damaging the design. |
Remove wrinkles | Crisp and fresh look |
| 8. Removing Stains | Treat stains promptly with a mild stain remover or a paste of baking soda and water Avoid scrubbing the design directly. Rinse with cold water before washing. |
Removes Stains | Stain Free clothing |
The 8-Step Detailed Guide For How To Wash F1 Apparel
Step #1: Turn Garment Inside Out

Turning your F1 t-shirts (crop tops, hoodies, etc) inside out will help protect the design.
While your clothes are in the washing machine, they rub against each other, generating friction. This friction can cause damage to your F1 shirts, including fading and cracking.
Turning your garment inside out will protect the printed design from rubbing against the washer and other clothing.
A simple way to put it is:
Less friction = less cracking & fading over time
Step #2 Use Delicate Wash Cycle
Use the “Delicate” or “Gentle” wash setting. Setting your washer to delicate or gentle cycle will reduces stress on both the F1 shirt and its design. Preventing it from cracking, fading, and getting distorted over time.
Step #3: Only Use Cold Water Your 1st Three Wash Cycles

Laundry detergent contain chemicals and enzymes that "break down" compounds. You want to give your new custom Formula 1 shirt some time to let the ink fully settle into the garment fibers. Which is why we recommend you use only water for your first 2-3 wash cycles.
After, use cold wash temperature + detergent:
Why not use hot water? Hot water can be brutal on print designs—it opens up the fibers, causes colors to fade faster, and can make DTG or screen-printed designs crack, peel, or look tired before their time is up.
Think of it like heat aging your shirt in fast-forward
Quick Recap: Hot water is one of the quickest ways to shrink your ruin your shirt. The common damage it can do to your F1 shirt is shrink it or dull the colors of the designs. Cold water, on the other hand does the opposite. Like prevent shrinking, color bleeding, and premature fading—especially with DTG and screen-printed graphic tees and hoodies.
Step #4: Choose Mild Detergent
The wrong detergent can be just as harsh as hot water.
Opt For Mild Detergent
Pick a mild, color-safe detergent that doesn’t contain bleach or brighteners, since those can strip color and wear down the print over repeated washes. Some good options to choose from are: Tide Free & Gentle, All Free & Clear, Molly’s Suds, or Ecos (all can be bought on Amazon).
Why You Should Avoid Using Fabric Softeners
Fabric softeners and dryer sheets can leave a waxy film on your graphic tee. Over time, that buildup can make your designs look dull, less vibrant, and almost “foggy” on the surface.
Step #5: Avoid Overloading Wash Machine

When the washing machine is overloaded, your shirts can’t move freely, which means:
1. The fabric and prints rub against one another with more tension and friction, increasing cracking, pilling, and fading.
2. Detergent and water can’t circulate properly, so residue gets trapped in the fibers and on the design.
3. Heavy items (like jeans or towels) grind against your custom tees, wearing down the print faster.
Aim to fill the machine about half to two-thirds full, leaving enough space for everything to move around easily.
Giving your shirts that extra breathing room in the wash can easily add months to the life of the print.
Step #6: Air Dry Or Tumble Dry Low
Air Drying Your F1 Apparel:
- Hang your F1 apparel or lay them flat to air dry, ideally inside out to protect the design.
- Avoid direct sunlight for long periods, as UV can slowly fade the fabric and the print.
If You Prefer A Dryer, Use Tumble Dry Low Temperature Settings:
- Set your dryer to low heat settings. High heat can shrinks cotton, weakens fibers, and can cause your F1 apparel prints to crack, peel, or feel rough.

Step #7: Removing Wrinkles
Wrinkles are fine. Melting your print isn’t. If you need to straighten things up, use a clothes iron properly. Turn the shirt inside out before you iron your F1 shirts. This will protect the design from direct heat of the clothes iron.
Removing Wrinkles With An Iron
- Set your iron to Low Heat setting. Try to avoid high temperatures because they can damage your t-shirt's design.
- Never iron the designs of the graphic apparel directly. The best way to ironing your clothes is to place a thin cotton cloth (such as a pillow case) between the F1 shirt and the clothes iron.
- Once you have done this, lightly press the iron, and drag it over the area you want to remove the wrinkles from (if its the design area always place a clothe in between).
Removing Wrinkles With a Steamer
- Turn your t-shirt or garment inside-out. Then follow the instruction that came with your steamer (instructions will vary depending on your steamer).

Step #8: Handling Stains
Treat stains as soon as you spot them and you can always do it the old fashion way with water and baking soda, or the easy way by using a stain remover. Or you can use some detergent and water. Use a mild, color-safe detergent (like Tide Free & Gentle, All Free & Clear, Molly’s Suds, or Ecos), work it in gently. First, gently blot the stained are with water, avoid scrubbing as it will smear the stain and make it worse. Then wash the F1 apparel properly. If the stain’s still there after washing, don’t machine dry—repeat the process. And that's it! I hope this helped. If not send us a message and we can help you out.
How should I wash my F1 shirts without damaging the design?
To protect graphic prints on your F1-inspired shirts, always turn the garment inside out. When using a washing machine, use cold water and delicate or gentle wash cycle. Use a mild detergent and avoid overloading your washing machine.
Can I use the dryer to dry my F1 shirt or hoodies without damaging it?
Yes. As long as you use low temperature setting, you can dry your F1 shirts or hoodies in a drying machine without damaging it.
What should I avoided when washing my F1 apparel?
Avoid using detergent that contains bleach, optical brighteners, or harsh enzymes when washing F1 apparel. Additionally, fabric softeners and scent boosters should also be avoided, as they leave residues that can stiffen prints and weaken ink adhesion.
How do you remove stains from F1 shirts and hoodies?
For stains, spot-treat the affected area with a small amount of mild detergent before washing. Gently work the detergent into the fabric with your fingers—never scrub directly over the printed area. Scrubbing can spread the stain, making it worse.

 https://utmostprovince.com/pages/about-us
Leave a comment
This site is protected by hCaptcha and the hCaptcha Privacy Policy and Terms of Service apply.